This week I've really had the urge to just bake something, something proper, that I could eat! As much as I love my cake orders...I never get to eat them - so I really wanted to make something I could have some of. I seem to have so many cookbooks at the moment I've not really been able to try much from so I thought this was a great opportunity to dig out Cake Days (The Hummingbird Baker), I absolutely love this book so it wasn't hard to find something.....peanut butter and chocolate pie! I have to admit I'm not a huge fan of peanut butter, but as it's combined with chocolate I was thinking...Snickers!
Though it's called a pie, mine definitely wasn't, I wasn't too sure about making the cookie base into a pie crust as such, so kept it more like a cheesecake base so you can see the layers, I also didn't trust it to keep it's shape enough to dish up.
I will also say that I did change the recipe (not on purpose!), I got carried away and made the middle peanut chocolate filling in one big mix, which means I didn't add cream to the left over peanut filling (as there wasn't any), so just made the cream for the topping. It's also worth saying that adding icing sugar to the cream for whipping is a revolution. I'm actually not a huge fan of cream on its own but like this...I could eat it by the spoonful! But actually I think this all worked better - I always seem to do this and it always turns out better in the end so I'm going to mark this as a win.
Ingredients:
Base:
250g double chocolate cookies
175g butter, melted
Filling:
3 tbsp cornflour
160g caster sugar
550ml whole milk
3 large eggs
180g crunchy peanut butter
80g dark chocolate, minimum 70% cocoa solids, chopped
250ml double cream
Topping:
250ml double cream
50g icing sugar
50 unsalted roasted peanuts, roughly chopped
One 9inch springform tin
Method:
1. First line the cake tin with baking paper, then blitz the cookies to a rough crumb in a food processor (or bash them in a bag with a rolling pin like me). Pour in the melted butter and blitz again. When both ingredients have come together in a rough paste, remove from the machine and tip into the lined tin.
2. Using the back of a spoon, press the crumb mixture evenly over the base and sides (or just the base like me), to a thickness of about 5mm, the place in the fridge to cool and set for about 40 minutes.
3. Meanwhile, make the filling. Mix the cornflour with the sugar in a saucepan, then mix together the milk and egg yolks and pour this into the pan. Place over a low heat and cook until thickened, whisking continuously, then remove from the heat and stir in the peanut butter.
4. Place the chocolate in a bowl and pour over about the third of the hot peanut butter filling (or all of it like me!). Mix well until the chocolate has melted and the filling is smooth and even. Pour the chocolate filling into the chilled cookie base, then cover the pie with cling film to stop a skin from forming, and place back into the fridge for about 30-40 minutes to allow the filling to set. Cover the remaining peanut filling with cling film and set aside to cool.
5. In another bowl, whip the cream, either by hand or using a hand-held electric whisk, until it is thick and forms soft peaks. Once the remaining peanut-butter filling has completely cooled, fold in the whipped cream, ensuring it is mixed in well. Remove the pie from the fridge and top with the second part of the filling then place back into the fridge for 40-50 minutes.
6. Next make the topping. Whip the cream and the icing sugar until the cream forms soft peaks, then spoon on top of the set pie filling and sprinkle with the chopped peanuts to finish, I also added some extra bits of finely grated dark chocolate.
So in the end I'm quite happy I messed up, I think there would have been a lot of layers otherwise, has anyone made it? I am however a bit gutted, I got a bit carried away when mixing the filling and splattered the peanut filling over one of my new tops - must remember to not wear new light coloured tops when baking!! So looking for some good stain removal tips. Considering I have a ridiculous amount of aprons I should have been wearing one!
But having a big slab of this dessert cheered me up, calorie bomb it may be...but who ever made a dessert worrying about calories, odd indulgences are good for the soul. I feel so tired this week so a big sugar kick is just what I needed I think :)
Nom! x
*This is a sponsored Post*
Pin It Now!
Wednesday, 25 April 2012
Sunday, 22 April 2012
Tom Hardy Heartthrob Giant Cupcake
This week was one of my best friends' birthdays, the big 21! I've known for a long time what cake to make her, it really was a no-brainer.
To say she likes Tom Hardy (from This Means War, Inception, RocknRolla) would be a serious understatement. I just had to get him on the cake, after using ricepaper for the One Direction cake I did recently I thought this would be the perfect way, and then she gets to eat him, perfect!
Finding a nice image I used Photoshop to rub out one of his tattoos and replace it with her name in a fancy script, I have to say it does actually look realistic.
The cake itself is vanilla with chocolate buttercream. The sponge is marbled with pink too for some extra girlyness. I though the only way to really do this cake was in a teen heartthrob fashion, like something you'd have in the back of your diary at school.
The 'case' is covered with pink fondant, coloured with Claret Sugarflair colouring paste, I then used the off cuts to cut out the hearts, butterflies and stars too. As I said the buttercream is chocolate, I've lost my 1M Wilton nozzle (cries!) but I have been abusing it recently so went a bit old school with a normal swirl nozzle which actually did look really nice. I like using Green & Blacks cocoa powder, the pigment is so dark is really colours up nicely and it made my car small INCREDIBLE when I drove it over (it was actually quite lucky to survive the trip - nervous driver).
I thought it would be best to literally just cut him out and place him on the top, so it looks like he's coming out of the cake. I did then pipe buttercream onto the bottom of the picture so it didn't look too Art Attacky. After placing him on the front I placed a big pink heart on top and piped 21 onto it. I then dotted the pink hearts and stars around the picture with a couple overlapping. I also added some white chocolate stars to add another girly, and it fitted nicely in to the theme.
I mirrored the decoration on the back and gave the whole cake a generous dusting of pink cake glitter. To finish it off I tied it up with a chocolate coloured ribbon making a bow at the front. I'm glad she liked the cake, I also used the image for her birthday card from Moonpig so she can keep him forever!
Nom!
Pin It Now!
To say she likes Tom Hardy (from This Means War, Inception, RocknRolla) would be a serious understatement. I just had to get him on the cake, after using ricepaper for the One Direction cake I did recently I thought this would be the perfect way, and then she gets to eat him, perfect!
Finding a nice image I used Photoshop to rub out one of his tattoos and replace it with her name in a fancy script, I have to say it does actually look realistic.
The cake itself is vanilla with chocolate buttercream. The sponge is marbled with pink too for some extra girlyness. I though the only way to really do this cake was in a teen heartthrob fashion, like something you'd have in the back of your diary at school.
The 'case' is covered with pink fondant, coloured with Claret Sugarflair colouring paste, I then used the off cuts to cut out the hearts, butterflies and stars too. As I said the buttercream is chocolate, I've lost my 1M Wilton nozzle (cries!) but I have been abusing it recently so went a bit old school with a normal swirl nozzle which actually did look really nice. I like using Green & Blacks cocoa powder, the pigment is so dark is really colours up nicely and it made my car small INCREDIBLE when I drove it over (it was actually quite lucky to survive the trip - nervous driver).
I thought it would be best to literally just cut him out and place him on the top, so it looks like he's coming out of the cake. I did then pipe buttercream onto the bottom of the picture so it didn't look too Art Attacky. After placing him on the front I placed a big pink heart on top and piped 21 onto it. I then dotted the pink hearts and stars around the picture with a couple overlapping. I also added some white chocolate stars to add another girly, and it fitted nicely in to the theme.
I mirrored the decoration on the back and gave the whole cake a generous dusting of pink cake glitter. To finish it off I tied it up with a chocolate coloured ribbon making a bow at the front. I'm glad she liked the cake, I also used the image for her birthday card from Moonpig so she can keep him forever!
Nom!
Pin It Now!
Friday, 20 April 2012
Flowers and Butterflies Giant Cupcake
It feels like a while since I did a giant cupcakes, it probably hasn't actually been that long, maybe I was just having withdrawals! So I was really happy when I was asked to make a girly giant cupcake for the weekend. My favourite brief as you all know, I love the doing girly ones I find them so easy I seem to make them without thinking which leaves me more time to clean up the kitchen I've just completely destroyed!
I think flowers look really lovely on a cake and I've done so many with hearts and stars on I thought maybe flowers would be a nice look and perfect for the girly theme. I made blue fondant rolled roses dusted with gold cake glitter Choccywoccydoodah style. I still had some rice paper butterflies left so thought these would look really nice dotted around the flowers and leaves, I did think about making fondant butterflies but these are so detailed and delicate they were much cuter.
The actual cake is vanilla as is the buttercream which is coloured with pink liquid colour and beaten within an inch of it's life! The bottom, the 'case' is covered in jam and white fondant which looks really crisp against the pink top. As the roses have gold glitter I thought a nice gold sparkly bow would match quite nicely, I didn't tie it all the way round as it's a wide ribbon it looked a bit heavy so a big bow looked perfect.
I have another cake to do over the weekend, so lookout for another post soon :)
Nom! Pin It Now!
I think flowers look really lovely on a cake and I've done so many with hearts and stars on I thought maybe flowers would be a nice look and perfect for the girly theme. I made blue fondant rolled roses dusted with gold cake glitter Choccywoccydoodah style. I still had some rice paper butterflies left so thought these would look really nice dotted around the flowers and leaves, I did think about making fondant butterflies but these are so detailed and delicate they were much cuter.
The actual cake is vanilla as is the buttercream which is coloured with pink liquid colour and beaten within an inch of it's life! The bottom, the 'case' is covered in jam and white fondant which looks really crisp against the pink top. As the roses have gold glitter I thought a nice gold sparkly bow would match quite nicely, I didn't tie it all the way round as it's a wide ribbon it looked a bit heavy so a big bow looked perfect.
I have another cake to do over the weekend, so lookout for another post soon :)
Nom! Pin It Now!
Thursday, 12 April 2012
Easter Cake Pops and Treats!
Easter is of course not Easter without a ridiculous amount of food, chocolates and sweets - well this is the case in our house anyway!
I did plan to do lots of baking this weekend but some of it got sidelined for going out and enjoying ourselves with the family :D, but more about that after, first I had another nice little cake pop order to make. I'm becoming more and more fond of these treats and it was great to be more adventurous I'm thinking of investing in some books like Pop Bakery, any suggestions are welcome. The brief? Easter! So it was pretty free really and I wanted it to be full of cuteness - and I have to say, I'm really pleased with them! After a lot of researching I soon found out that chicks were the most popular theme, simple but sickeningly cute I couldn't resist making them. The biggest colour theme running through this time of year is pastel, you see it everywhere and it seems so fitting for Easter. I also then made pastel blue cake pops with white pearl polkadots that actually had a Tiffany & Co look about them and also white chocolate drenched in hundreds and thousands.
I really wanted to make hot cross buns this year but just never got around to make them and am so jealous seeing everyone's pictures popping up of them fresh from the oven. We still bought some though, can't have Easter without hot cross buns and butter. I did however manage to make some Norwegian shortbread biscuits and even decorate some. Again I was feeling inspired by Peggy Porschen and went for the polkadot theme and dusted them off with yellow cake glitter, yum!
Now I may be 24...but that didn't stop be from making cornflake cakes! These, along with rice crisp cake might be some of my favourite little nostalgic treats to make. Topped off with mini eggs, of which we still have about 6 bags left (yay!) to complete the birds nest look. I made so many I had to bring the rest into work to share them around, who said you can have too many anyway?
As I mentioned in my last post I made my mum an Easter egg...I had a go anyway. I've seen so many eggs like this I really wanted to try to make one. Jazzles are such a cute looking sweet, perfect to use on an egg. Layer up the sweets in the mould I drizzled some melted chocolate over a few now and them while layering on more chocolate to give it some structure so they wouldn't just fall off when taken out of the mould. After painting on layers of white chocolate in-between cooling the two halves in the fridge I left it to set overnight. I should have made it thicker but it still popped out with ease. Using chocolate that was melted but almost set again I glued the two halves together and again left to set overnight. I wasn't really sure how to present the egg so I opted for the 'egg in mug' look, I was also going to cellophane and ribbon it but I run out after all the ones we did for the family. It's definitely less hassle to just buy an egg from Tesco, but sometimes it's nice to try new things and make something a bit personal now and then. What did you all make for Easter?
Pin It Now!
I did plan to do lots of baking this weekend but some of it got sidelined for going out and enjoying ourselves with the family :D, but more about that after, first I had another nice little cake pop order to make. I'm becoming more and more fond of these treats and it was great to be more adventurous I'm thinking of investing in some books like Pop Bakery, any suggestions are welcome. The brief? Easter! So it was pretty free really and I wanted it to be full of cuteness - and I have to say, I'm really pleased with them! After a lot of researching I soon found out that chicks were the most popular theme, simple but sickeningly cute I couldn't resist making them. The biggest colour theme running through this time of year is pastel, you see it everywhere and it seems so fitting for Easter. I also then made pastel blue cake pops with white pearl polkadots that actually had a Tiffany & Co look about them and also white chocolate drenched in hundreds and thousands.
Now I may be 24...but that didn't stop be from making cornflake cakes! These, along with rice crisp cake might be some of my favourite little nostalgic treats to make. Topped off with mini eggs, of which we still have about 6 bags left (yay!) to complete the birds nest look. I made so many I had to bring the rest into work to share them around, who said you can have too many anyway?
As I mentioned in my last post I made my mum an Easter egg...I had a go anyway. I've seen so many eggs like this I really wanted to try to make one. Jazzles are such a cute looking sweet, perfect to use on an egg. Layer up the sweets in the mould I drizzled some melted chocolate over a few now and them while layering on more chocolate to give it some structure so they wouldn't just fall off when taken out of the mould. After painting on layers of white chocolate in-between cooling the two halves in the fridge I left it to set overnight. I should have made it thicker but it still popped out with ease. Using chocolate that was melted but almost set again I glued the two halves together and again left to set overnight. I wasn't really sure how to present the egg so I opted for the 'egg in mug' look, I was also going to cellophane and ribbon it but I run out after all the ones we did for the family. It's definitely less hassle to just buy an egg from Tesco, but sometimes it's nice to try new things and make something a bit personal now and then. What did you all make for Easter?
Pin It Now!
Wednesday, 11 April 2012
Easter Weekend - Visit From The Vikings
Friday and Saturday were spent in Cambridge. They'd never seen Primark
before, everything in Norway is so expensive compared to here so it was
no surprise that my cousin and I spent 3 hours in there..THREE! And I
have to say it was great, trying on mounds of clothes and laughing
at the awful ones, then comes the scary count-up at the end and trying to
get the total down which at one point did hit £145! We then hit Nandos
which again you can't find in Norway, and mainly because One Direction
eat there, ate a stupid amount but completely worth it.
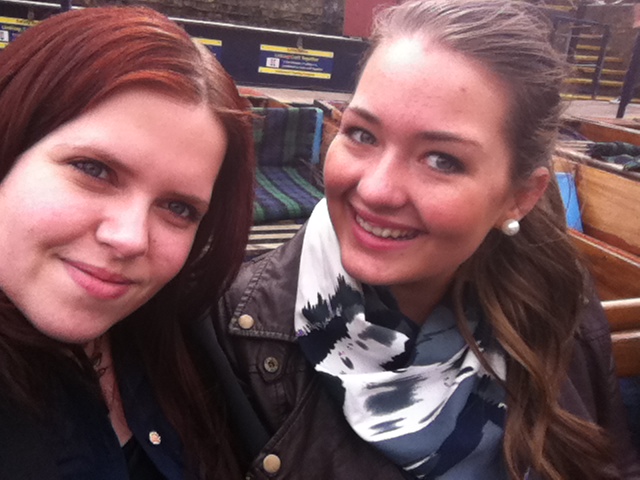
Saturday was a tourist day and we spent the day punting along the river Cam, walking around the old streets, seeing the Universities, the famous fudge shop, gold clock, man playing guitar in a bin (true story) and eating more food of course! In the evening we went out for Chinese and had the funniest evening ever, quite literally spent the whole evening in hysterics which was brilliant.
I have to say I love my Easter 'egg', a giant chocolate cupcake!! How perfect...not eaten it all yet... My mum loved the Mozart chocolate balls (don't laugh), so I got her a load of those and even tried making her an actual egg from the moulds I got in Poundland, I think it's definitely much easier to just buy them! But it still looked cute. Keep posted for all of the Easter treats I made.
I love the cupcake headband my niece got...I got one too! Handmade by Norwegian designer Fam Irvoll. These will now be our new baking gear for whenever we're together
Hope you all had a lovely Easter!!
Nom! x
Pin It Now!
Subscribe to:
Posts (Atom)


