Showing posts with label victoria sponge. Show all posts

Thursday, 4 August 2011

Cake Pops! Heaven On A Stick!

I first heard about cake pops about a year ago, thought they sounded interesting but never got round to researching them more. But now it seems they are everywhere, and some are seriously cute so I'm quite jealous. So of course I decided to give them a go, I didn't use anyone's recipe as they were all American that I could see, a tub of frosting etc....but I need actual measurements I'm really picky with that. So I kind of just made it up and luckily - it worked out!

First I crumbled one Victoria Sponge - medium sized (4 egg recipe) into a bowl so it looks like bashed up biscuits. They say chocolate cake holds together better but I thought I would keep it easy and stick to the classic one. There will be a few bigger lumps, but this just gives it a bit more texture, and don't trim away the golden egde, these were originally made from cake scraps so keep some of the history in there!

You then mix buttercream into the cake crumbs. I mixed together 35g butter and 75g icing sugar, I then coloured it with Pink Sugarflair Colouring Paste to look bright against the coating. Mix all of these together and well combined. Now start adding the buttercream to the cake crumbs, don't add it all at once as you may not need all of it, and once you add the buttercream and mix it...you can't take it back, so just do it bit by bit. You want it to still be fairly crumbly, but that it can be formed into a ball and hold together.

I rolled them into balls (ping pong ball size) and stick them in to freezer for 30 minutes, some say not to as the covering will crack, mine didn't though so go for it. Using white lollipop sticks (eBay £3.20 for 50 ish) you gently twist them in about halfway, then I melted some white cake covering chocolate as it cools quick, dip them in, only once! and give them a brisk twizzle to get off the excess and swirl the pop slowly for 10 seconds or so until more set, I then placed them in a mug in the fridge to set properly.

It really wasn't that difficult, thankfully, I used a little too much buttercream in mine so they were bit rich but still gorgeous! If you want to add sprinkles etc then do that fairly soon after dipping (but not straight away!) or you can add icing or melted chocolate drizzles when cool. You can also accessorize with little bows or alternatively place them upside down in petite four cupcake cases for a posh look!

And eat!!! Nom! Pin It Now!

Tuesday, 5 July 2011

Raspberry Ripple Cupcakes - From The Book That Started It All..Cupcake Heaven!

About a year and a half ago my cake obsession really kicked up a notch. I also enjoyed baking and throughout University I was getting into bits of it here and there, until one Christsmas circa 2009 I was given a book...

Which is quite funny as I had been wanting this book but was too poor so couldn't justify luxuries around Christmas shopping time. The book in question is Cupcake Heaven by Susannah Blake. Buy it, you won't be sorry.

This is responsible for my cupcake obsession and general baking indulgence. One thing I really love is how great the actual pictures are, sometimes the pictures are so rubbish you do wonder if a 3 year old was let loose on them...and I think a 3 year old would do a better job - rant over.


I have a few favourite recipes from here, in particular the Victoria Sponge cupcakes and the Raspberry Ripple ones. My picture the Victoria Sponge one isn't brilliant, so I'll have to make another batch soon to take more photo's - of course!

But while your waiting here's the recipe for the Raspberry Ripple ones to keep you going. I seem to have a nack for taking picture of pervy looking cupcakes!

Recipe:
  • 115g unsalted butter, room temperature
  • 115g caster sugar
  • 2 eggs
  • 115g plain flour
  • 1/2 tsp baking powder
  • 2 tablespoons raspberry jam
  • 150g icing sugar
  • 1-2 tsp lemon juice
  • pink food colouring
  • 12 raspberries
  1. Preheat oven to 180 degrees (celcius).
  2. Beat butter and sugar together until light and fluffy.
  3. Then beat in the eggs, one at a time.
  4.  Sift in the flour and fold into the mixture.
  5. Put the jam into a bowl and stir until runny.
  6. spoon dollops of cake mixture into paper cases and flatten slightly with the back of a teaspoon.
  7. Making a slight indent and spoon a little bit of the jam into the middle. Top with remaining cake mix.
  8. Drizzle a little but more jam on top, and with a skewer marble slightly to get a ripple effect.
  9. Bake in the oven for about 18 minutes until risen and golden.
  10. Transfer to wire rack and cool.
  11. To recorate, put the icing sugar in a bowl and gradually stir in the lemon juice until you have a thick consistently.  Keep some aside for the plain piping.
  12. Add a couple of drops of pink colouring to the remaining and mix for an even colour.
  13. Spoon the icing onto the cakes.
  14. Take the white icing and put it into a piping bag with a narrow nozzle (or a freezer bad with a small part of the corner cut off!) and pip swirls onto the pink icing going into the centre.
  15. Take the raspberries and place one on each of the cupcakes in the centre.
  16. Eat! Nom.
Book image from Bespoke Country Pin It Now!

Sunday, 3 July 2011

This Week In Cakes

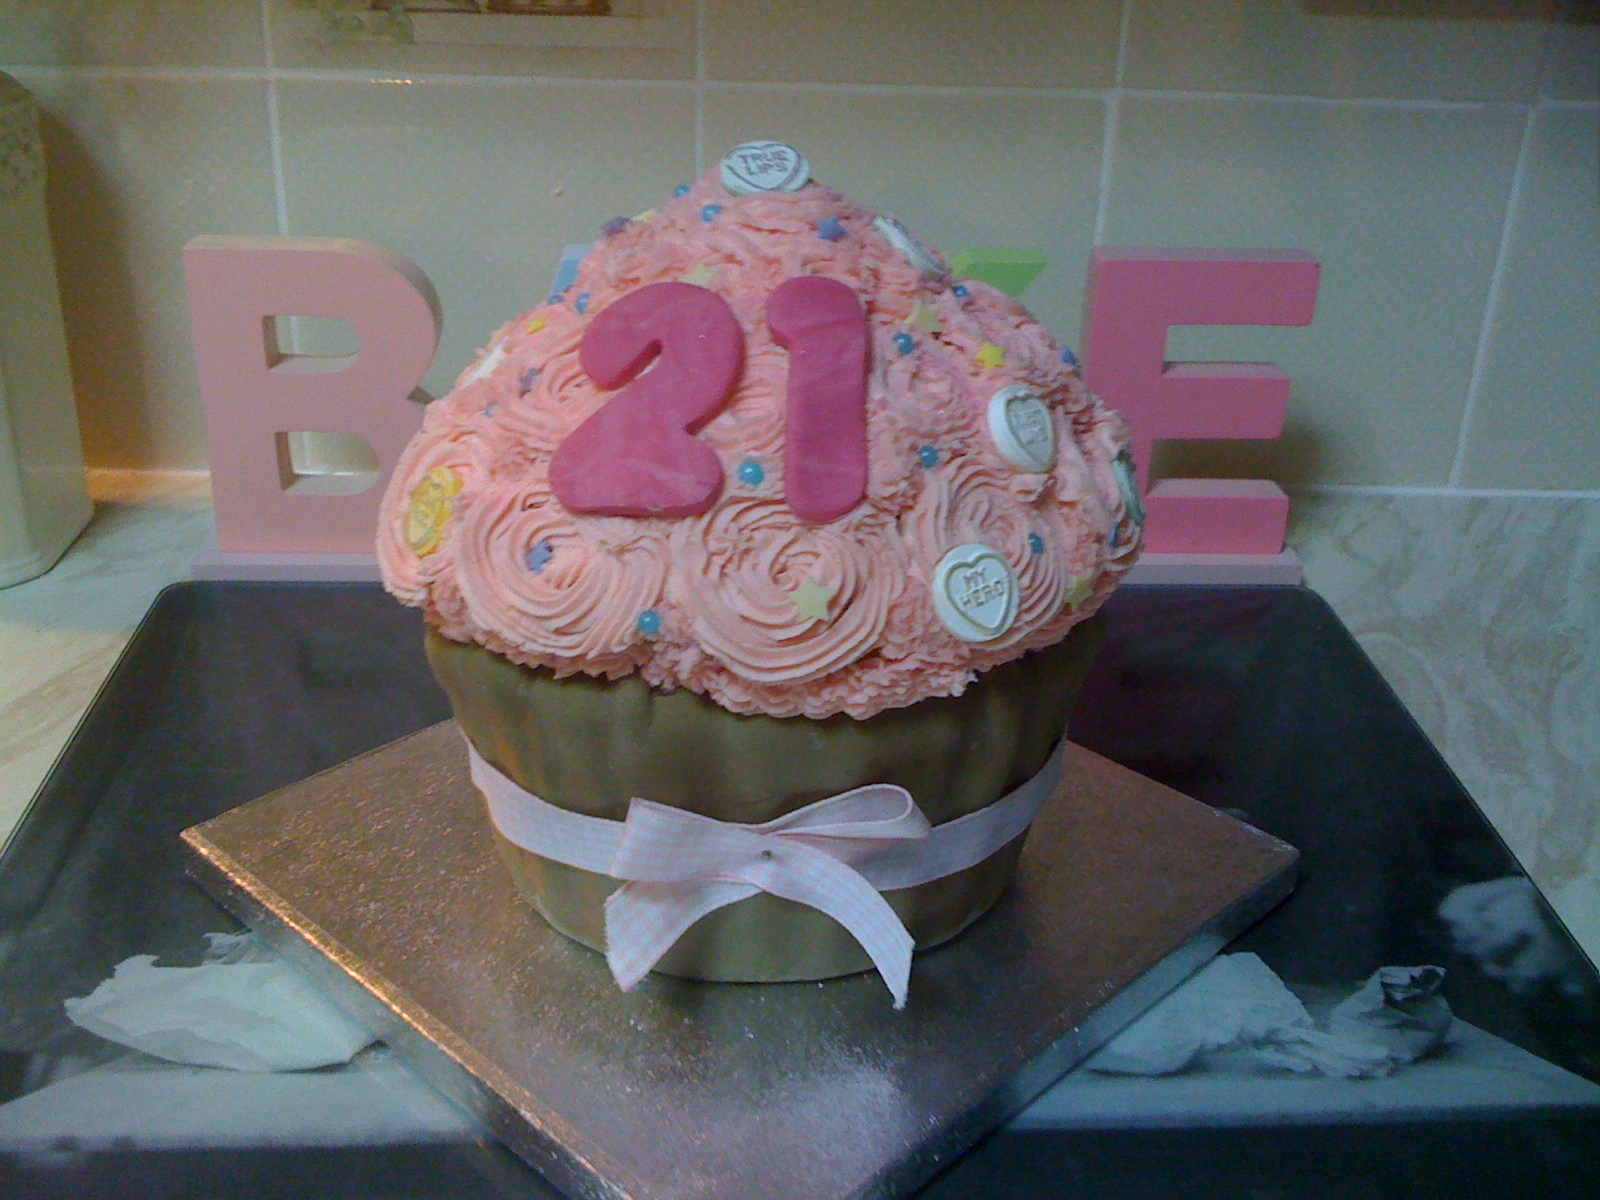
This week I had two cakes to make, luckily they were in my favourite form - giant cupcakes! I could make these in my sleep now and you can do so much with them so I love them.


I hadn't done a really girly one in a while so I was really happy when I got an order for a 21st birthday one. Lots of Love Hearts, pink buttercream, stars and even a cute gingham ribbon. The cake itself is Victoria Sponge with jam on the bottom part and more pink buttercream in the middle. I used chocolate brown Sugarflair colouring paste to make the case part, and claret Sugarflair paste for the icing. These really do give off the nicest colours and a little goes a long way. Both the number and the buttercream were made from the claret one, this just shows how deep you can get it by simply adding a bit more.

The next cake here is for Swavesey Primary School Fete to go into the raffle to win it. It's nice to help out where you can and there is no better way than with cake. The theme was 'treasure island' so I thought this was a good representation of it. Because the surface are isn't that massive on top there is only so much you can put on it before it starts looking silly, so I went for of course a treasure chest, made from fondant coloured with melon yellow and chocolate brown, I added some yellow stars to look like the brass studs and make it look a bit more special, I then added some random pieces of decoration to look like treasure. I also added some fondant coconuts, an 'X marks the spot'  and even a palm tree. I discovered making a palm tree out of fondant was almost impossible, so I just made the trunk out of fondant supported with cake wire. And for the leaves I stripped green liqourice, flattened the green cut offs, cute them into palm leaf shapes and stuck them on top just slightly going through a piece of cake wire to keep them together. It was a bit of a mission but I love how it looked so it all worked out. Oh yes and the sand, I mashed together a bag of Malted Milks until they looked like fine sand and covered the top in them (which was subsequently covered in vanilla buttercream), this cake was also made of Victoria Sponge and the bottom was covered in baby blue Sugarflair paste with a few extra stars to give it a treasure feel. Pin It Now!

Sunday, 26 June 2011

Chocoholic Birthday Cake

The time finally came to make the ultimate chocolate cake. It was my friends birthday yesterday, we've known each other since we were 11 and the one thing you could never dispute...is that she loved chocolate. So it was an easy decision what sort of cake to do when it came to her surprise birthday cake.

Ok so first of all, it's not allll chocolate, I made the sponge a Victoria one, I thought if it was all chocolate then I'd probably kill her with sugar! But I did use chocolate buttercream to give it a bit of chocolatey goodness.

It's two tiered, leveled with my cake leveler, this is a really simple tool to help keep everything straight and even as it's so easy to make it wonky without realising.
I got mine from Lakeland for £3.29.

I thought rather than using icing to make it look like chocolate, I would use actual chocolate, one of my friends suggested I use Curly Wurlys on the outside as they have a nice pattern. This actually worked really well, thought it took 19 of them cut in half! I then covered the tops of the tiers in Cadbury's chocolate buttons, Maltesers and white chocolate stars. I piped some buttercream on for the finishing touch. To top it off I tied a purple Happy Birthday ribbon around it to give it the Cadburys touch!

The perfect cake for the chocolate lover Pin It Now!

Friday, 20 May 2011

Lavender And White Two Tier Birthday Cake


It was one of my best friends birthdays recently, and as I couldn't be there for her birthday I decided to whip her up a little birthday cake.

I had some new cake decorating gizmos from a great cake decorating shop in Oslo when I was visiting called 'Cacas'. It was my haven, an official supplier of Wilton it was filled with everything you could ever want to decorate with, it's just a shame it all cost a fortune!

I usually do the big pink cakes, so I thought I would do her something different, a victoria sponge cake, made up of two layers, one being pink and the other lilac so there was a little surprise when you cut into it.

I covered it in lavender coloured fondant and decorated it in plain white for a classic look. For the decorations I used this Wilton mould where all you had to do is push the fondant into the moulds and lift them out, the trick to this is to dust it in icing sugar first so it will come out clean.

This mould came with ribbon and button designs which is the type I use the most so it's worth the crazy import rate.

The lettering on the front spells 'cheeky', this may seem odd, but it's kind of a catchphrase around here, and they named their new place 'cheeky towers' so it fit quite well. I also piped peals around the seam of the bottom tier to top it off and complete the look.

For an added extra bit of detail I used the brownie stencils I also bought in Cacas, and spread icing over them, lifted of the stencil and was left with a pretty pattern that took no time but looked cute and tied in the colours. I love this cake because it's sleek looking, really pretty colours and was girly without going too pink for once, and of course, it was very cheeky... Pin It Now!

Tuesday, 10 May 2011

The Booby Cupcake

Another week another cupcake. Giant cupcakes are starting to become my signature bake, which is fine because I love making them, you can do pretty much anything to them as I discovered with this beauty.

It was my sister-in-laws birthday this week...and she is very proud of her boobs, so it was a natural decision to put this into her cake.

I really wanted to make her a boob cake like you get in the shops, but wanted to make it from scratch myself, a bit like the babyshower cake that I did. However, she really wanted one of my cupcakes. We moved house this week so a lot of my tins etc were packed away, so I thought I would yield and do the cupcake.

But to make both of us happy I combined both cake ideas! A cupcake, with boobs on! The boobs themselves are just made from lightly coloured pink fondant with red fondant heart nipple tassles - why not! I made it a sexy pink to help make it a bit more risque too. I then added pink polkadots to a chocolate brown fondant for some extra cuteness.

Could there maybe be a new route in booby cakes? Pin It Now!

Sunday, 3 April 2011

This Week In Cakes

This week has seriously been cake week, I've done four! Luckily three of them were cupcakes so it wasn't too bad.

My first cake was for a 1st birthday and had the characters from Waybuloo on it. This was a challenge as I hadn't done anything from this TV show before so I had to do a lot of Googling. All I can say is thank God for Sugarflair colouring pastes, A year ago I hadn't used any before and they are incredible! Thanks to them I managed to get colours bright enough for a kids cake.


I also had a Mother's Day cupcake to make, a clean and simple white and pink Victoria sponge cake one, sometimes keeping it simple can make it look brilliant.


I had a surprise leaving cupcake to make for a colleague who loves pink, so I created this beauty which I think looked very girly and definitely pink! Loved it, love hearts always add that extra girly touch!


Finally it was my mum's birthday this week and I wasn't able to make a cake for the day of her birthday as I had some orders taking over, so I made her one for the day of Mother's day so she can have a dual one. I made it as a cupcake as the shape was perfect, I made it look like a bunch of Daffodils as they are her favourite flower. I couldn't get hold of any Sugarpaste in time so I made the flowers out of fondant, which wasn't too bad but I then had to let them dry for a long time but luckily it worked! It's Victoria sponge with lemon butter icing, nom!
Pin It Now!
Related Posts Plugin for WordPress, Blogger...